
Patient
In OneOfficeERP Healthcare, the Patient document corresponds to any individual who is the recipient of the healthcare services you provide. For every document, it is important to have a Patient associated with it.
To create a new Patient:
Home > Healthcare > Masters > Patient > New Patient
1. Create a Patient
- Go to the Patient list and click on New.
- Enter the First Name, Gender, Blood Group, DOB, etc.
- Enter the patient's mobile number. This is important if you have enabled SMS alerts for patients.
- Enter the email address for the patient.
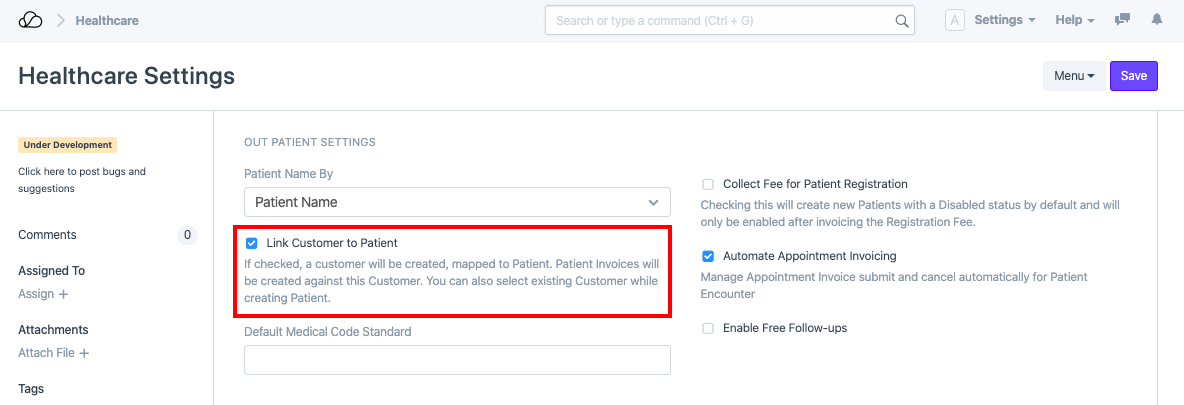
- For the "Customer" field you can create a customer and select it here. If you don't create select a Customer and you have enabled "Link Customer to Patient" in Healthcare Settings, a customer will be automatically created and linked as soon as you save the document.
- Save.
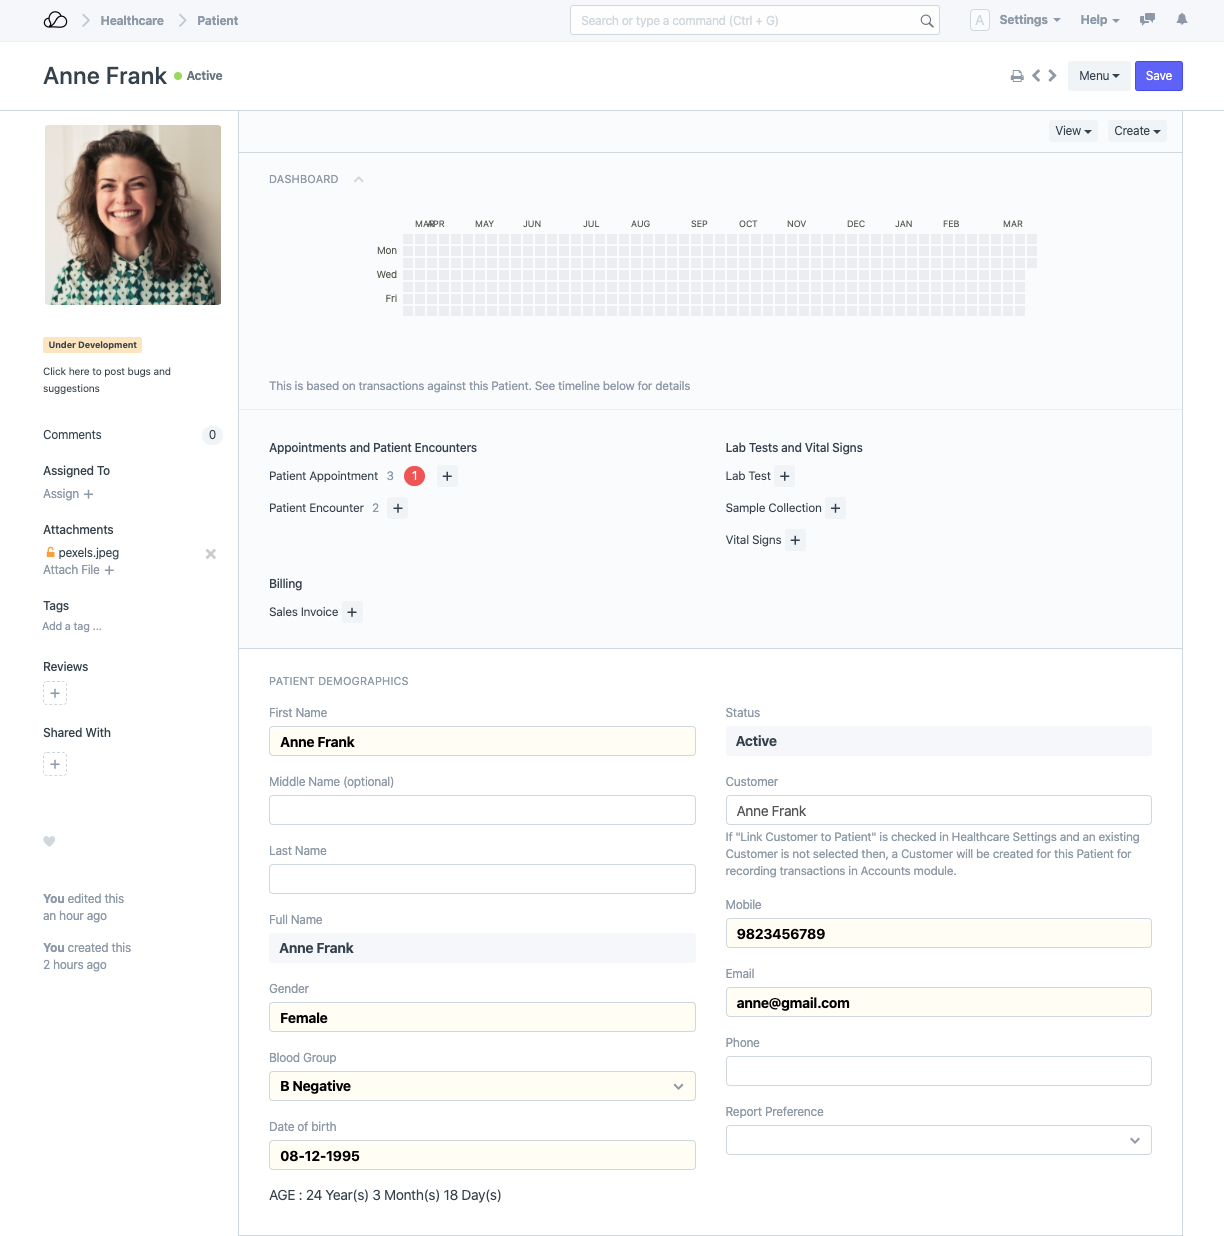
Note: Linking a Customer to the Patient is necessary for billing and invoicing.
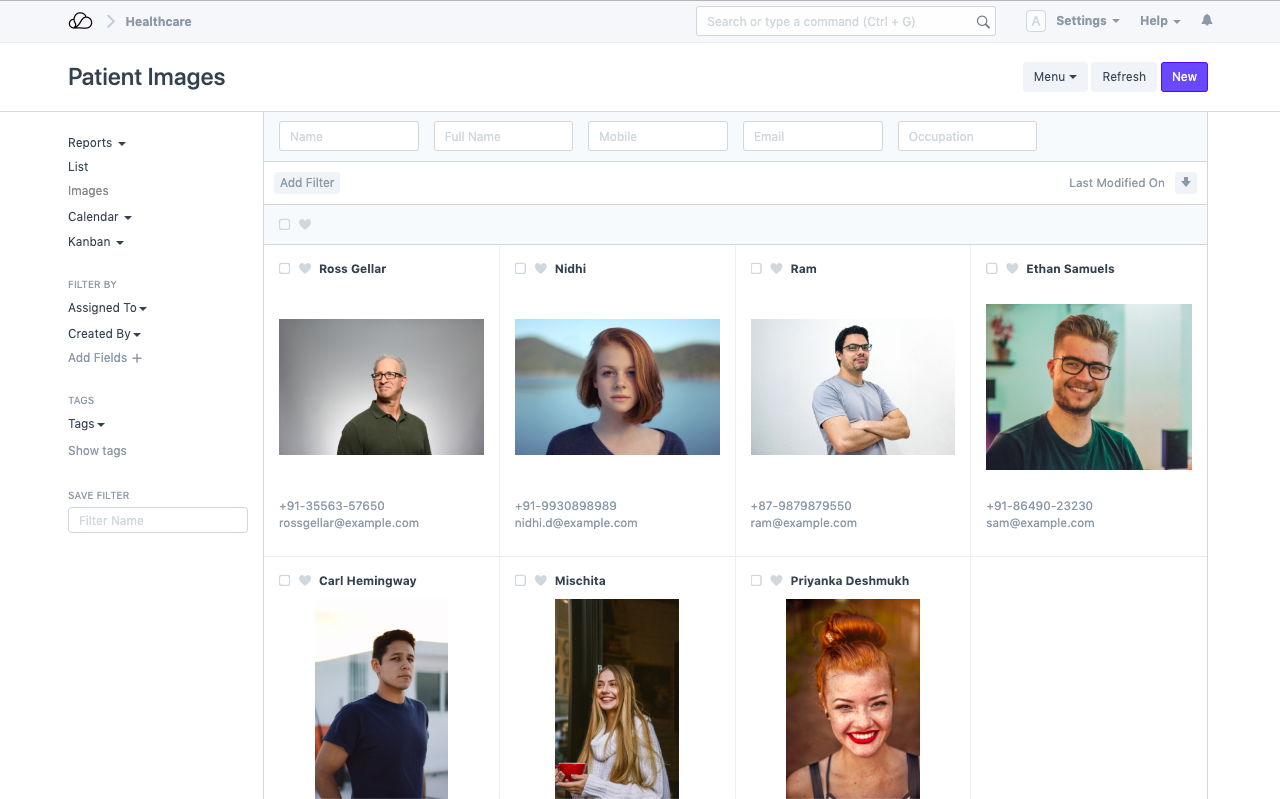
Switch to "Image" view from the list sidebar to view and edit multiple patients along with their photos.
2. Features
2.1 Capture History
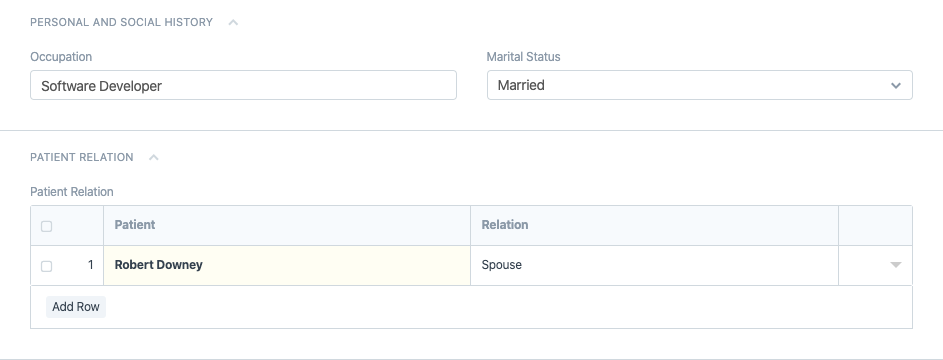
2.1.1 Personal History
You can optionally capture Personal History like Occupation and Marital Status along with Patient's Relations with existing patients.
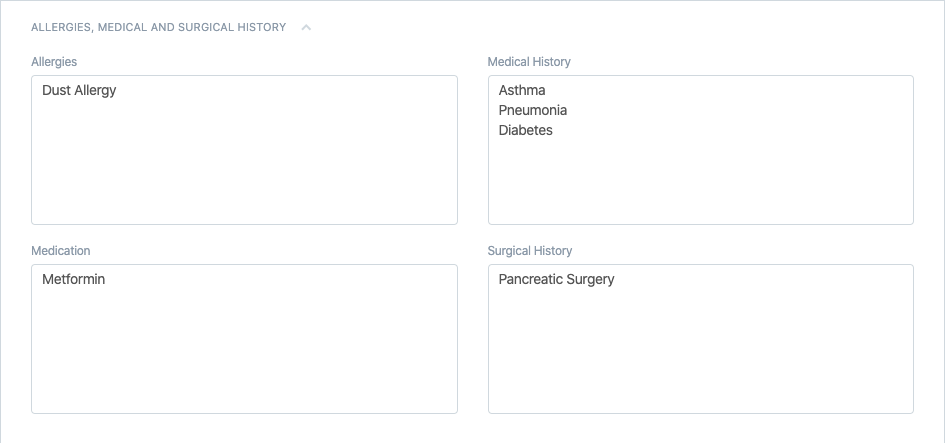
2.1.2 Capture Medical History
Optionally capture Medical History like Allergies, Medications, Medical History and Surgical History.
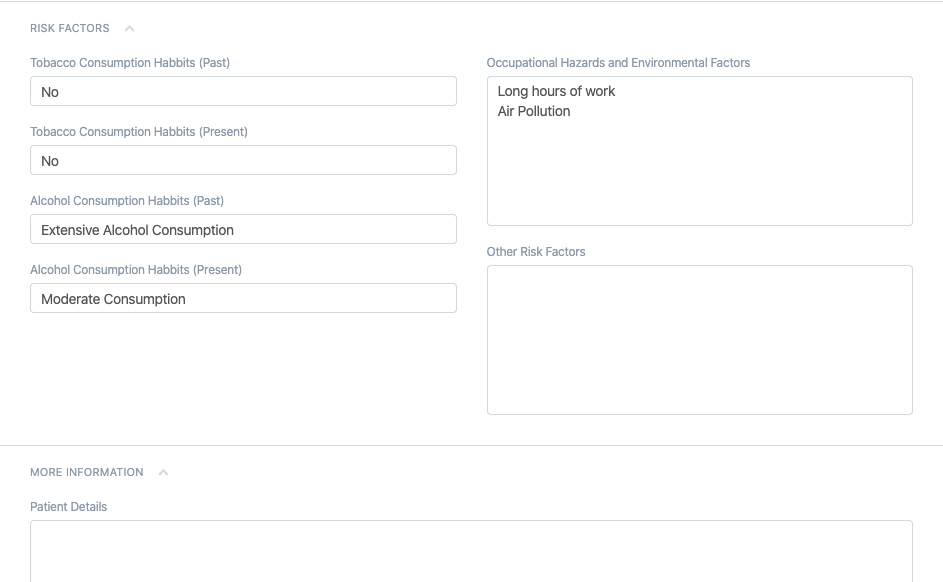
2.1.3 Capture Risk Factors and More
Capture Risk Factors like Tobacco and Alcohol consumption habits, etc.
2.2 Patient as a Customer
OneOfficeERP, especially the Accounts module, makes use of Customer document for booking all transactions. So, you may want to associate every Patient with a Customer. By default, the system creates a Customer alongside a Patient and links to it. If for some reason you do not intend to use the OneOfficeERP Accounts module you can turn this behavior off by disabling the flag "Link Customer to Patient" in Healthcare Settings.
In many cases, you may want to associate multiple Patients to a single Customer against whom you want to book the transactions. For instance, a Veterinarian would require the care services provided to different pets of an individual invoiced against a single Customer. In that case, select the same Customer in all these patients while creation.
2.3 Registration Fee
Many clinical facilities collect a registration fee during Patient Registration. You can enable this feature by checking the "Collect Registration Fee" in Healthcare Settings and set the registration fee amount.
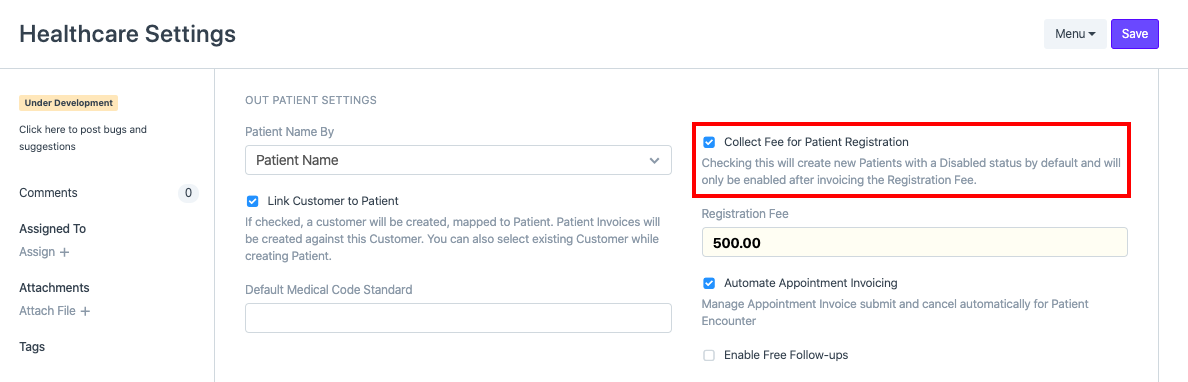
If you have this option enabled, all new Patients you create will be in the "Disabled" state by default and will only be enabled after Invoicing the Registration Fee. To create Invoice and record the payment receipt, you can use the Invoice Patient Registration button in the Patient document.
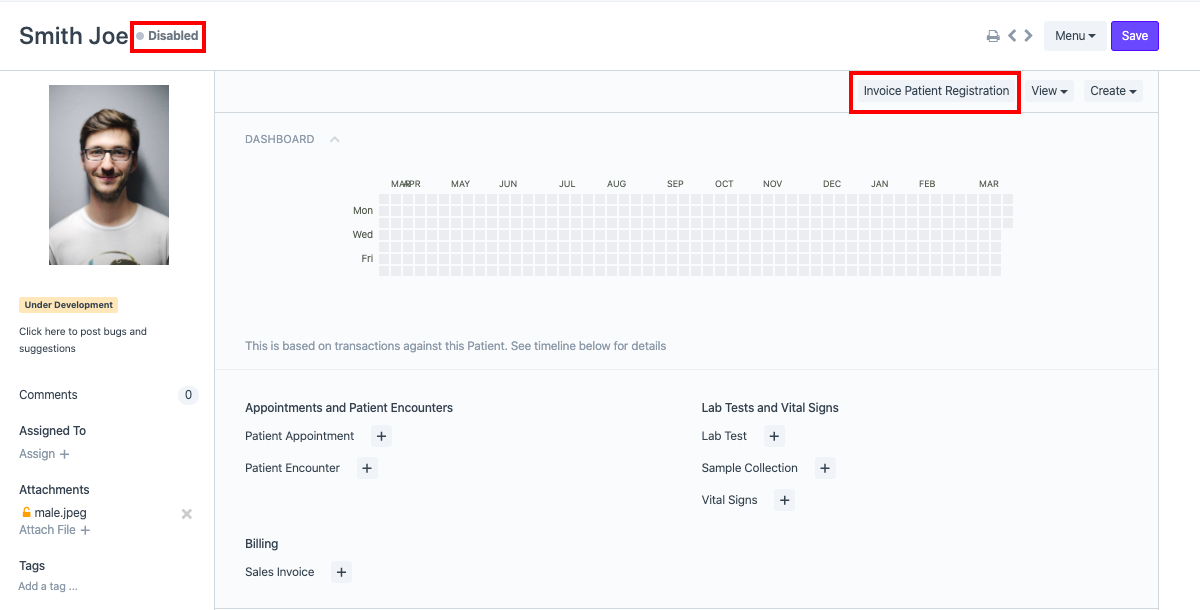
Note: "Disabled" Patients are filtered out in all OneOfficeERP Healthcare documents.
2.4 Grant Access to Patient Portal
OneOfficeERP Healthcare allows you to create a portal user associated with a Patient by simply entering the user email id. A welcome email will be sent to the Patient email address to "Complete" registration.
2.5. Actions
Note: User should have appropriate privileges (User Role) to view the buttons
You can use the document links in the dashboard to traverse the linked document list with the Patient filter applied or use the + icons to create new records. Apart from this, the Patient document allows you to,
- View Patient's Health History, using View > Patient History button.
- Create > Vital Signs to record the vitals of the Patient.
- Manually add data to a Patient's Medical Record, for instance, a scanned copy of a Lab Test performed in an external Laboratory or a quick note on the Patient's condition, using Create > Medical Record button.
- Record the details of an encounter by using Create > Patient Encounter button
The Patient document holds the Patient barcode and can be used in any the default print formats or any Custom Print Formats that you create for printing patient identification tags.
This Form has been Changed in Version 13