How to process Payroll
Most of the users find it difficult to process payroll in OneOfficeERP, but rather than it being difficult, it is a bit tedious in the initial setup. Once, the setup is done it, the process for the following months becomes easy. Kindly go through the below steps for a quick guide:
1. Create Payroll Period
In this, you define a period for which you want to process the payroll for. It could be January to December or April to March as per the year followed by your company.
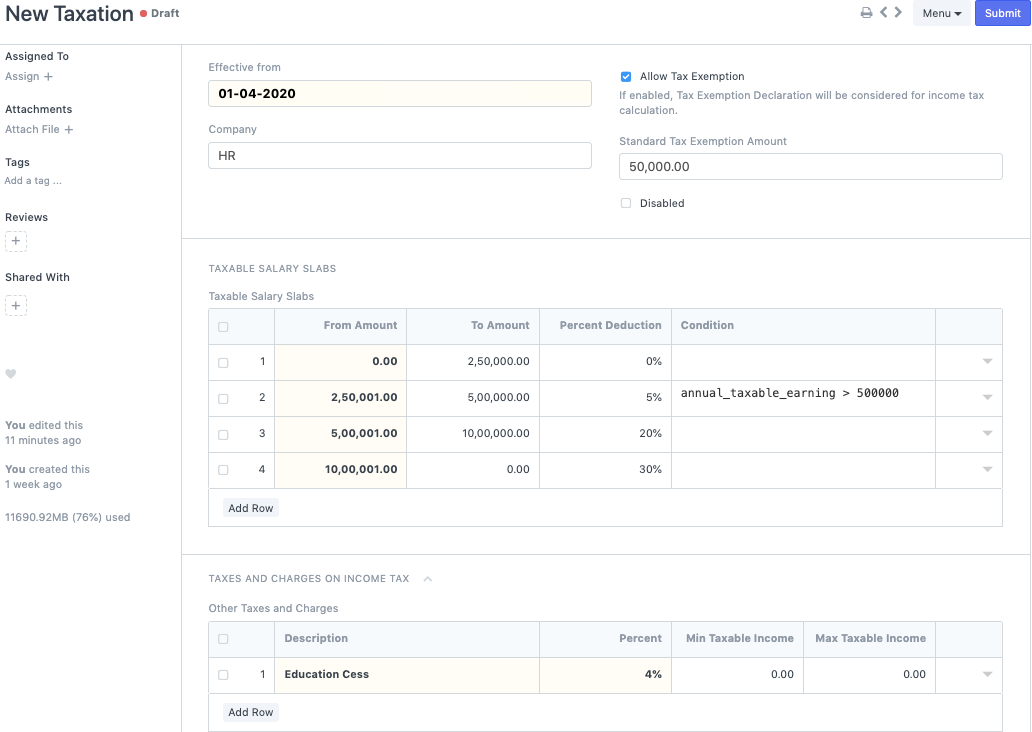
2. Create Income Tax Slabs
Over here, you can create multiple Income Tax slabs, if needed by your tax authorities (most countries only need a single Income Tax Slab). Define the slabs as per the government rule. You can also add additional tax in the section below and conditions in the table if required and also check 'Allow Tax Exemption' in case there is a standard deduction applicable.
3. Submit Employee Tax Exemption Declaration
An employee who has some investments can submit tax declarations to avail tax benefits and thus can reduce their Income Tax amount. (Applicable for many countries in terms of Taxation).
4. Define Salary Components
You can create salary components and define whether the component is an Earning or a Deduction component. There are certain checkboxes that you can check depending on the component type. Select the company and a default ledger account. Now, these salary components can be based on a particular formula or it can be a fixed amount. Only for Income Tax component you need to check a particular checkbox called "Variable based on Taxable Salary". This will ensure that the Income Tax is calculated automatically in the backend.
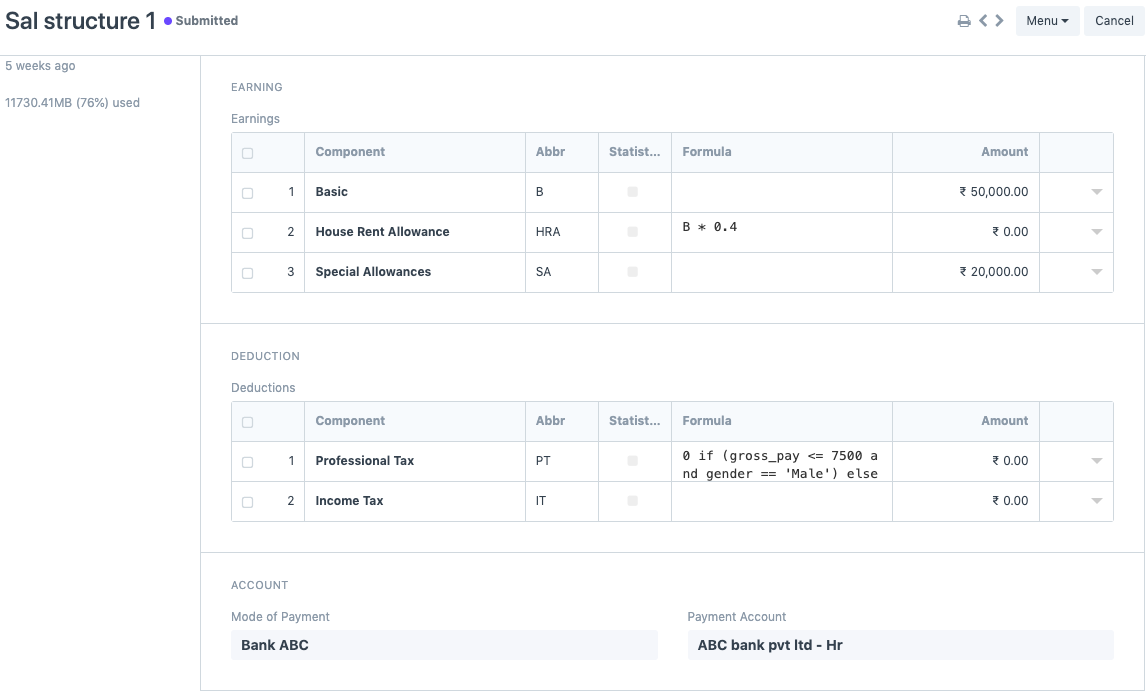
5. Create a Salary Structure
Once you have created all the salary components, you can define a salary structure. You can also define whether the salary is based on timesheets. You can add the earnings and deductions as per your choice and the mode of payment.
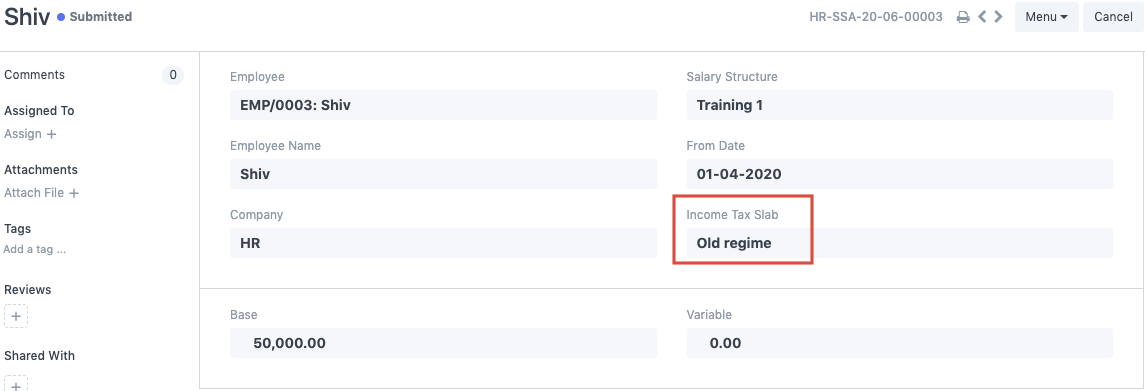
6. Assign the Salary Structure
Once the salary structures have been created, you need to assign it to employees. If you miss this step, then you will not be able to proceed further. During assignment, you have to select the Income Tax Slab (if you have multiple slabs), since the percentage deduction of Income Tax will be calculated based on the same. You can also define a base amount if your salary structures are based on formulas.
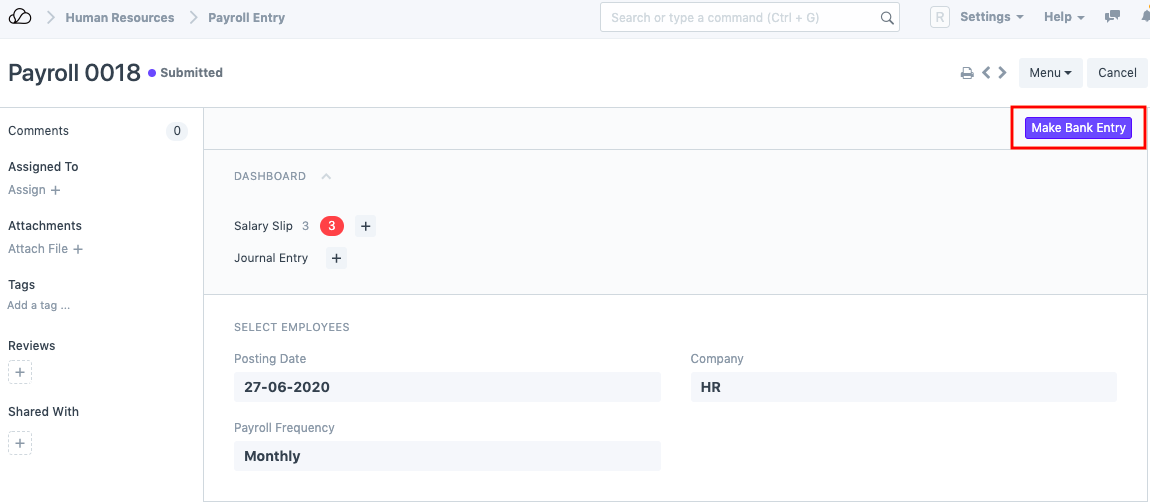
7. Create a Payroll Entry & Salary Slips
Once all of the above steps are done, you need to create a payroll entry. Once you have selected the payroll date, frequency and added the payment account, you can filter employees on the basis on department, designation and branch. If you do not wish to do so then you can directly click on 'Get employees'. On doing so, a list of all the employees will populate in the Employee Details section. You can then proceed by clicking on "Create Salary Slips" and all the salary slips will be generated in draft.
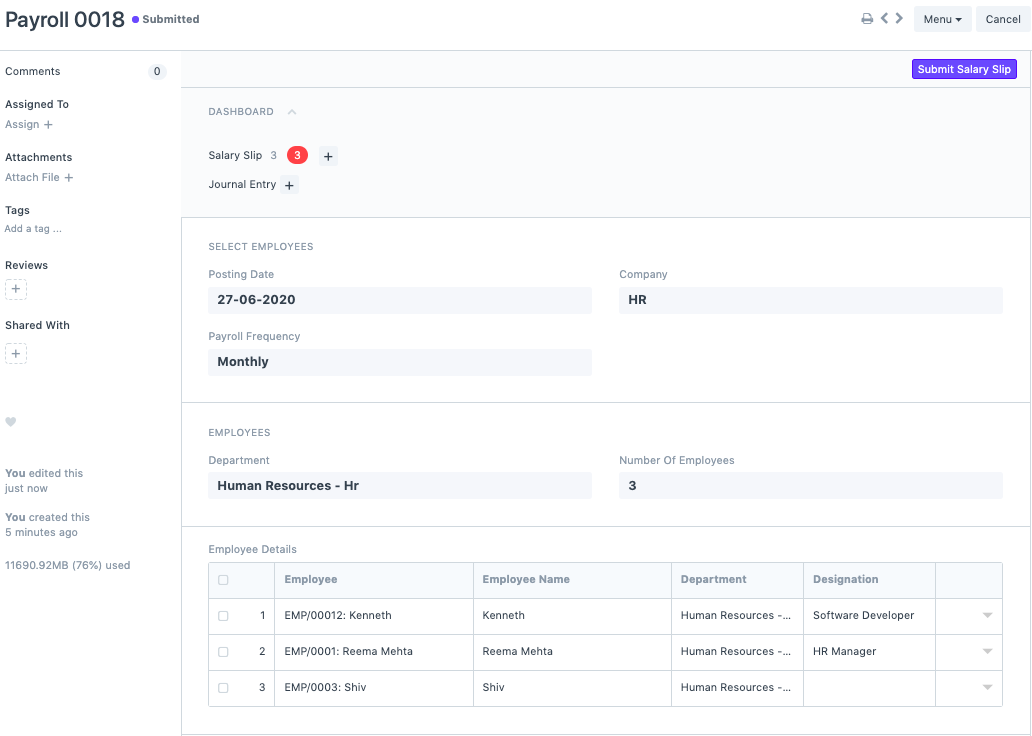
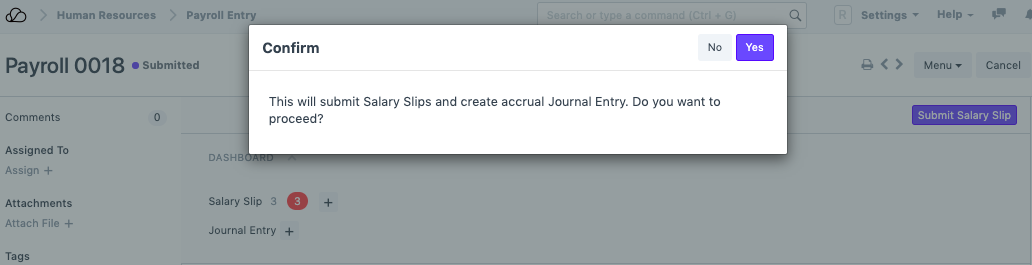
You can verify the draft salary slips and then submit them via the payroll entry. On submitting the salary slips, an accrual journal entry will be created. This means we are booking the salary expenses in the system and not paying them.
8. Bank Entry
Once you have booked the accrued salary slips, as a last step you need to make a Bank Entry. With this last step, your payroll process is completed, but this does not mean the salaries are transferred in the bank. That minor step has to be done manually.