Setting Up
Users & Permissions
Print
Email
System Configuration
Data Privacy
Articles
Using OOERP
Collaboration
Articles
Accounts
Setup
Journals & Payments
Tools
Advanced
Opening Balance
Shareholders
Articles
Asset
Buying
Basics
Setting Up
Articles
CRM
Reports
Setting Up
Human Resources
Setting Up
Employees
Attendance
Leaves
Employee Lifecycle
Payroll
Tax & Benefits
Performance
Travel & Expense Claim
Gratuity
Reports
Articles
E-Commerce
Loan Management
Loan Cycle
Articles
Projects
Project Management
Time Tracking
Advanced
Quality Management
Selling
Setting Up
Reports
Articles
Stock
Variants
Transactions
Serials & Batches
Returns
Reports
Articles
Support
Website
Agriculture
Diseases & Fertilizer
Analytics
Education
LMS
Setting Up
Schedule
Healthcare
Setting Up
Consultation
Nursing
Rehabilitation
Hospitality
Manufacturing
Bill Of Materials
Reports
Articles
Non Profit
Membership
Volunteers
Donors
Grants
Chapters
Customization
Records
Navigation
Articles
Integration
Banks
E-Commerce
Shipping
Payment
Taxes
Telephony
Regional
Germany
United Arab Emirates
South Africa
Saudi Arabia
Student Admission
Student Admission is a document which can be configured to initiate an Admission Process for your institution by publishing it on the OneOfficeERP generated website.
To access student Admission, go to:
Home > Education > Admission > Student Admission
1. Prerequisites
Before creating a Student Admission, it is advisable that you first create the following:
2. How to create a Student Admission
- Go to Student Admission list and click on New.
- Select the Academic Year for the Student Admission.
- Enter the Application Form Route. This is the navigation URL for the Online Admission portal.
- Save.
Once the Student Admission has been saved, you will be bale to see a link on the left sidebar, saying See on Website. This link will allow you to see the Student Admission Portal on OneOfficeERP generated website.

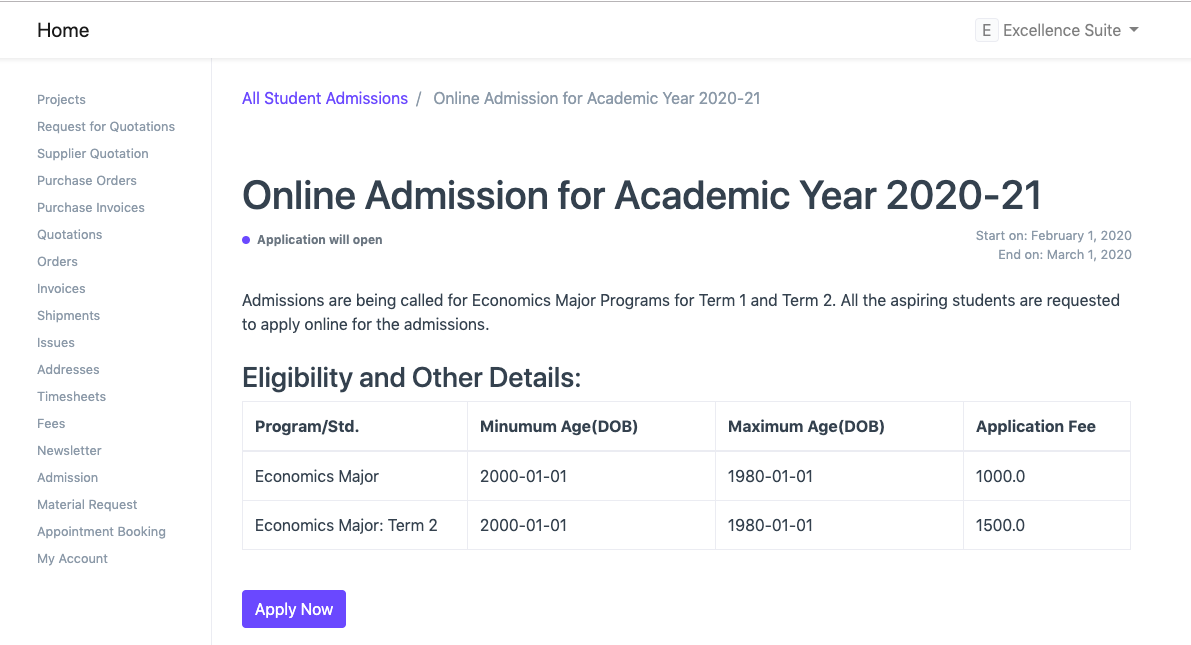
This is what the Student Admission will look like in the website view:

2.1. Additional Details while creating a Student Admission
- Title: Enter the title for the Student Admission Portal.
- Route: Enter a desirable path which will become the url extension for the admission portal.
- Admission Start Date: Select the date for the start of online Admission Process.
- Admission End Date: Select the last date for applying to online Admission Process.
- Publish on Website: Check this box when the content of the portal is ready and the Admission Process can be kickstarted on the website.

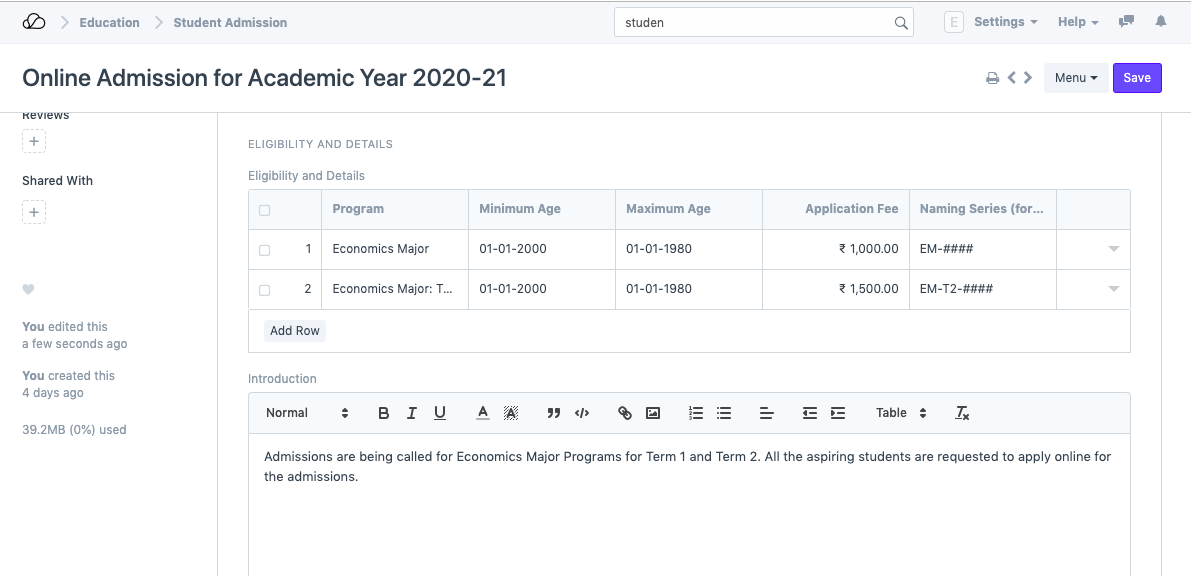
2.2. Eligibility And Details
- Program: Here you can select which program are the admissions being called for.
- Minimum Age: Enter the probable birth-date of the youngest person that can seek admission in the program.
- Maximum Age: Enter the probable birth-date of the oldest person that can seek admission to the program.
- Application Fee: You can choose to declare the application fee for the selected program.
- Naming Series: Here you can define the Naming series based which the forms of the Admission Seekers will be named ond ordered.
- Introduction: You can add a brief introductory information about the admission process so that it is better understood to the admission seekers.
